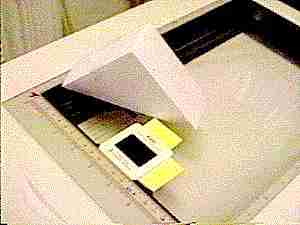
Here's the scanner with the cover removed and a slide on the glass,
held in position by two pieces of PostIt. The BackLighter is off
to the side.
And here it is again, ready to begin scanning.
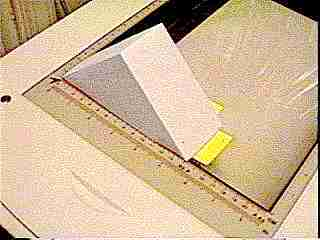
In the next picture we're looking up at the slide and BackLighter--the scanner's view. The image is of the entire width of the scanner. The left side of the BackLighter rests on the upper corner of the glass (in this view), and the slide is near the center of the glass. I've removed the two PostIts so you can see more clearly where the BackLighter is. The black area is where there's nothing on the glass to reflect the scaner's lamp light.

The slide should be near the center of the scanner glass, but the paper BackLighter can extend to either side of the slide. All it needs to do is reflect some of the light from the internal lamp onto the top of the slide, so that the scanner's sensor can pick up what passes down through the slide. (Thinking that more might be better, by the way, I tried making a BackLighter large enough to span the entire scanner--but it didn't work nearly as well. Less is more.)
Normally, I stick two small Post-Its to the glass--one on the right of the slide and the other below the slide in this view--so that every slide is in the same place and I don't have to move the scan area each time. I've removed the Post-Its here so you can see the BackLighter better.
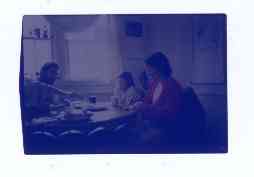
IMPORTANT !!!
In the above scan, the slide image is obviously much too dark--because
the scan software is compensating for the brightness of the white BackLighter
and the slide's holder. We'll need to adjust some of the scanner
software settings to make the image useful.
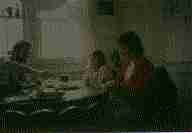
First, however, here's a scan of the slide alone, but still including
most of the white plastic holder. It's hard to see the holder here,
but the scanner saw it all too well.
THE SCAN WILL BE TOO DARK IF YOU DON'T LIMIT
THE SCANNING AREA TO THE FILM ALONE.
Here's the slide again, but with the scan area confined to the image
alone. This is slightly better, but it's still too dark.
Okay, it's time to change some settings.
IMPORTANT: I had the scanner Preview the slide again before scanning it. And I'll Reset the scanning software and repeat the Preview again after every step below.
Now let's begin using the wizardry described by Wayne Fulton in his terrific scanner book. I urge you to give it a good look. The tricks below came from Wayne's online book.
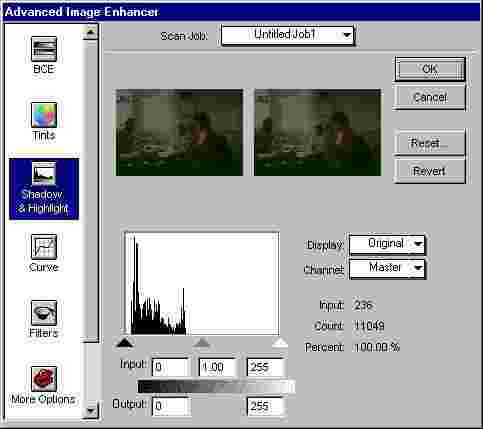
First, here's my scan software's "Advanced Image Enhancer," where I'm going to adjust the "Shadow & Highlight" setting.
By the way, I'm using a Microtek ScanMaker E6 600 dpi flatbed scanner and the scanner driver software that came with it, ScanWizard. Your scanner software may be different (or better?), but it probably has controls similar to mine.
The two images of the slide are "before" on the left and "after" on the right. They're the same because I haven't changed anything yet. The graph below them shows the default settings. Notice that in the graph, all of the vertical data bars are on the left, or "dark" side. We need to move the "light" side of the scale to the left by dragging the little white triangle.
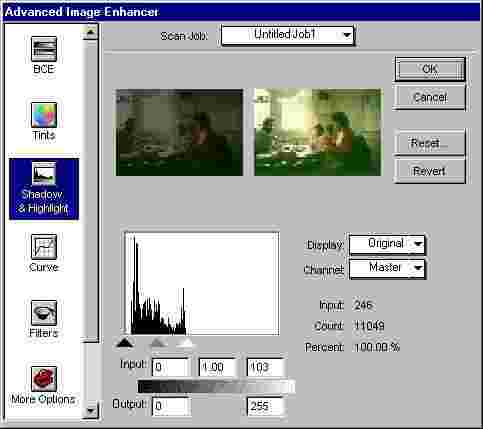
Below is the same window after I slid the right-hand triangular slider as far to the left as I could before the Percent changed from 100% to 99%. Look how the "after" image has brightened up! I could have also adjusted the left-hand slider, but that would have darkened the image slightly.
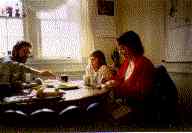
Here's a 150 dpi scan of the slide with the above Shadow & Highlight
adjustment..
If you don't have a Shadow & Highlight control like this, you may
be able to achieve the same results by increasing the exposure setting.
This slows the progress of the scan head and allows more light to reach
the sensor. If you can't adjust the exposure time either, then increasing
the brightness and contrast might work--although I've found that it's better
to change them only after the scan.
The final step is to turn on the Unsharp Mask filter. (Another
of Wayne Fulton's good ideas.) I just used the filter's default setting
here.
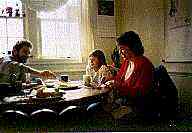
Even at this low resolution you can see how much sharper it is. This is a "difficult" slide, by the way. I shot it with ISO 400 film and available light. The room was lit only by the north windows in the background, so I had trouble getting the faces to show up. My son Chris is on the left, and the others are my wife's college roommate Marlene and her daughter Johanna. The photo needs cropping, but I'm leaving it just as I shot it here, so you can see how the scanner and the software handled it. Also, I used the same slide in the pages describing my earlier methods.
Here's the same image scanned at 600 dpi. It's 444 kb, so be patient.
Here's Johanna, scanned at "2400 dpi" (600 optical, with software interpolation),
using the same settings described above. 
Very romantic! Of course, that's just another way of saying the
picture isn't very sharp--but, then, this portion of the slide is only
about 4 mm wide and it's only a 600 dpi (optical) scanner.
| The important thing is always to preview each different slide and always to reset everything before previewing. THEN you can set the Shadow & Highlight and turn on the Unsharp Mask filter to get the best-looking image. |
Good luck! And please let me know how this works for you.
Don Maxwell

(Please type it into the "To:" box in an email message.)